
Preparations in PrestaShop: Create a secret key
Open the backend of your PrestaShop account.
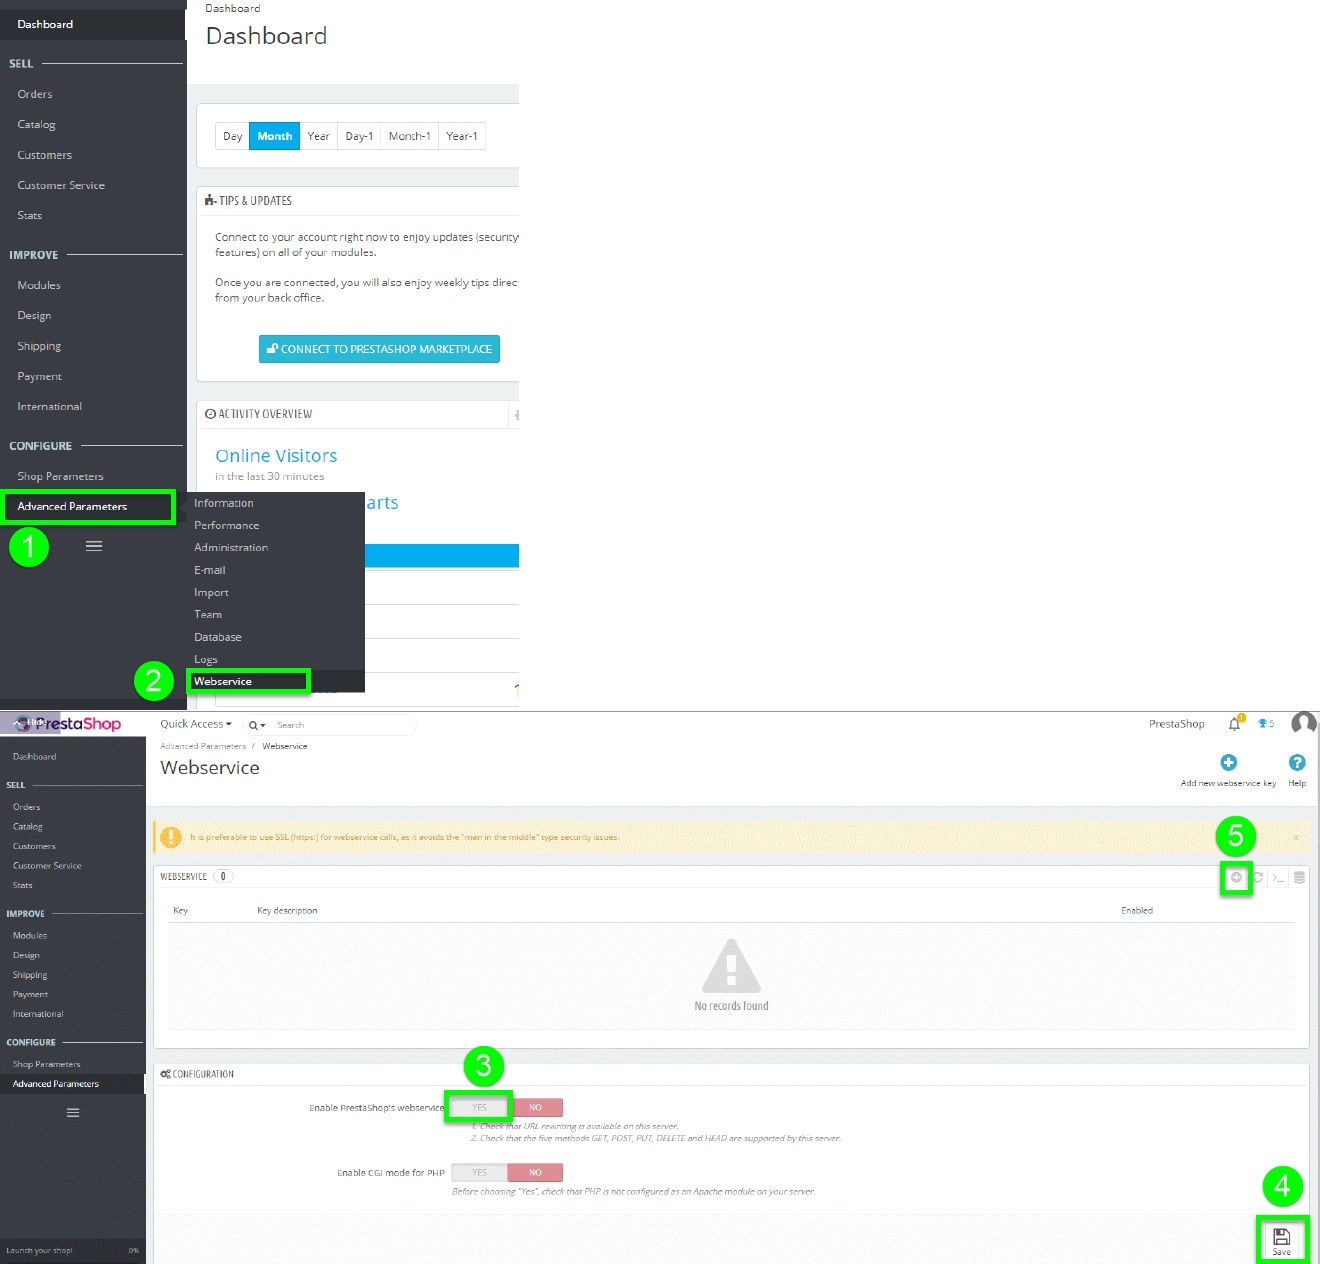
- Open the Advanced Parameters tab.
- Select Webservice.
- In the Configuration area, set the Enable PrestaShop’s webservice slider to Yes and sometimes PHP CGI mode to Yes
- Save the setting.
- Click on the plus button in the upper right corner to create a new secret key.
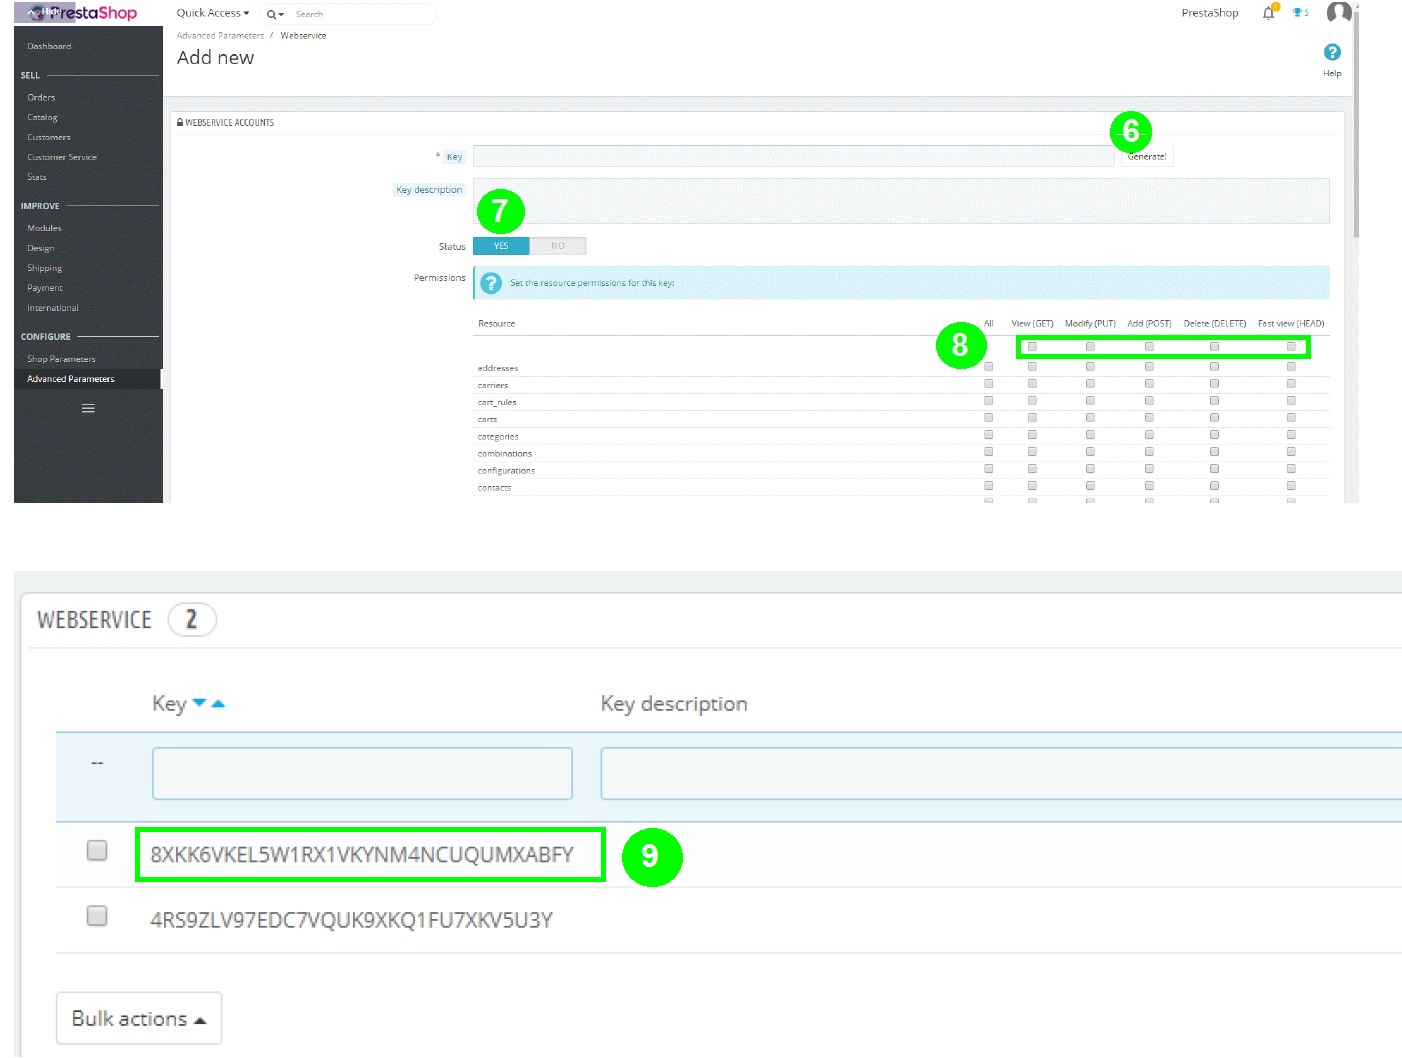
6. Click in the line *Key on the button Generate.
7. Under status set the slider to Yes.
8. Set all checkmarks in the Resource line to have full access rights via the API Key > Save.
9. The secret key can be found under Web Service.
Establish connection between reybex and PrestaShop
Open your reybex account, go to the transaction marketplace wizard [OMP06] > select PrestaShop in the left bar under available shops.
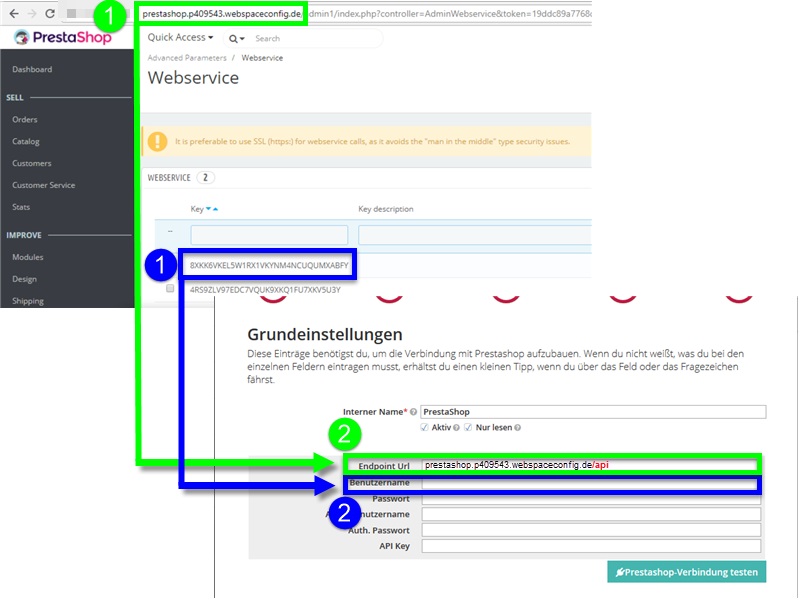
Enter Shop URL
- Copy the URL of your PrestaShop shop.
- Insert the URL into the line Endpoint URL in the reybex Marketplace Wizard and add /api at the end (see screenshot).
Enter Secret Key
- Copy the secret key from your PrestaShop backend.
- Enter the secret key in reybex in the Username line (see screenshot).
Please note: If you copy and paste your data from PrestaShop to reybex, please make sure that you do not copy any spaces. This will lead to errors in the connection to your PrestaShop shop.
After you have entered everything, test the connection.
Fill in the relevant fields until the last input mask. Click on Proceed in each case. Under Import Categories click on Read categories and import your PrestaShop categories to reybex. Click on Save and start article import.